Server week : The essential SSH Server.
Mar 18This week in “Server week” we are going to set up a variety of servers that allow you to do a variety of things. One of the most basic and versatile server you can set up must be the SSH Server. Long time fans probably know that the SSH server is the base ingredient for a lot of fun stuff you can do. For example.
- Transfer files over the internet.
- Work with command line applications from a remote computer.
- Tunnel your browser traffic through your own server to stop nosy network admins.
- Connect to your home network with a VPN connection.
These are just a couple of things you can do, but before you can do that, you will need the basic ingredient : Let’s set up an SSH Server.
Required ingredients.
- Debian based Linux distribution : ( you can do it with a redhat based one too, but we use a debian based one for the tutorial)
- Static ip for your Linux distribution.
- Connection to the internet.
- If you don’t have a static IP : A dynamic DNS service like opendns or Dyndns.
- An open port on your router forwarded to your linux machine.
Let’s get cooking.
- Open up a terminal on your linux machine and type : sudo apt-get install openssh-server
- After the server is installed, connect to it from a remote machine using a terminal application like Putty (for Windows) Secure Shell (for the Chromebooks) or from the terminal on other Mac and Linux machines.
- Connect to your Linux server with the command : ssh yourusername@theipofyourserver
And starting out that is ALL you need to do. If you want to do this from the internet you need to forward the correct port (The standard port is Port 22) from your router to your linux machine so you can make it accessible from the internet.
Lets make it pretty.
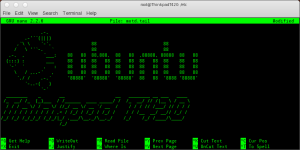
- Want to have a unique login screen when you connect ? create a cool ASCII banner using THIS tutorial.
Lets make it secure.
- SSH servers run standard on port 22, so a lot of scriptkiddies will go around the internet and “knock” on your port 22 to see if there is a server there. We are going to “obscure” the location of your SSH server a little by changing the default portnumber (Remember you also need to adjust this on your server) Follow THIS tutorial to get you started.
- Next time you connect remember to connect with ssh -p portnumberyouchose yourusername@theipofyourserver
- If you want to get rid of entering your password when you connect you can log in using secure SSH keys. Its a little bit on the advanced geeky side but it DOES keep your machine extremely secure : Only a machine with a unique digital fingerprint can connect using this method : Here is a good tutorial.
Lets start using it.
The SSH server offers you a variety of functionalities we talked about in previous blogposts. We will line up the best uses for SSH here.
- Make a VPN connection to your home network using SSHUTTLE.
- Turn your server into a proxy server and tunnel all browser traffic though your home server. (here is the pdf howto)
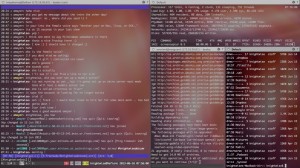
- Keep an eye on what your server is doing.
- Run a remote supergeeky wordprocessor.
- Run remote graphical applications.
- Have a blast controlling your server from the command line.
- Run command line apps.
These are just a couple of examples of what you can do over this very powerful little SSH connection. Remember always to use strong passwords and keep your server up to date. Have fun !
Related Posts
kw606 : Making your Mac cross platform friendly.
Jul 06 We dive behind the microphone and give all of you Apple users a slice of pie you don’t want to pass up on. We talk about making your Mac “Slider” friendly and how to put up ladders and crawl out of Apple’s walled garden. We have quite a slew of interesting tips and tricks on how to run “cross platform” applications, files, filesystems and connections through your favorite Mac. Learn and listen to this episode of the podcast that is filled to the rim with community feedback and contributions and great music by Youtube princess Juless.
Shownotes.
- Why ?
- How to get started.
- Remapping your brain and your body.
- Desktop enhancements.
- Loginox.
- PathFinder.
- iTerm
- 20 Best command line hacks.
- TextWrangler
- QuickSilver
- Crashplan
- Make executable scripts on OSX.
- Cross platform applications.
- Use Virtualbox in Seamless mode.
- Web tools.
- Online Photoshop Pixlr
- Macports.
- Cronnix.
- Dropbox
- Bittorrent Sync
- Macfuse
Tweak code (Copy and paste in your OSX command line)
#make dock appear instantatiously
defaults write com.apple.Dock autohide-delay -float 0 && killall Dock
#don’t reopen every file when you reopen your app.
#in preview
defaults write com.apple.Preview NSQuitAlwaysKeepsWindows -bool false
#in quicktime
defaults write com.apple.QuickTimePlayerX NSQuitAlwaysKeepsWindows -bool false
#kill the dashboard
defaults write com.apple.dashboard mcx-disabled -boolean YES
killall Dock
#show the path in the finder
defaults write com.apple.finder _FXShowPosixPathInTitle -bool YES
#disable window animations
defaults write NSGlobalDomain NSAutomaticWindowAnimationsEnabled -bool false
#enable direct scrolling
defaults write -g NSScrollAnimationEnabled -bool NO
#no more bouncy windows when scrolling
defaults write -g NSScrollViewRubberbanding -int 0
#set time machine backup to 1800
sudo defaults write/System/Library/LaunchDaemons/com.apple.backupd-auto StartInterval -int 1800
#force expanded save-and-print dialogs
defaults write -g NSNavPanelExpandedStateForSaveMode -boolean true
defaults write -g PMPrintingExpandedStateForPrint -boolean true
#no 3d-glassy dock
defaults write com.apple.dock no-glass -boolean yes
#show hidden files in finder
#defaults write com.apple.finder AppleShowAllFiles TRUE
#killall Finder
#3d glassy dock
defaults write com.apple.dock no-glass -boolean no
#make hidden app icons semi transparent
defaults write com.apple.Dock showhidden -boolean yes
#create a ‘recent items’ stack
defaults write com.apple.dock persistent-others -array-add ‘{ “tile-data” = { “list-type” = 1; }; “tile-type” = “recents-tile”; }’
#screen grabs in jpg
defaults write com.apple.screencapture type jpg
- Music by Juless
- Feedback by Mr Gadgets and Matt McGraw
- Join the community on Google+
Related Posts
iterm2 : The best terminal replacement for the mac.
Jun 16Sliding around from OS to OS and using the terminal as your ‘best friend’ makes for some interesting challenges. For one finding the answer to the question : ” What terminal do you use ? ” Most of you mouse jockeys might say ” Who cares ? A command line is a command line ?” But it is not that simpel. Every “terminal application” gives you different ‘ways’ to interact with the terminal. From keyboard shortcuts to multi layout windows .. every terminal app is a little different.
On Linux one of the favorite apps I use is “TERMINATOR” (No, Not you Arnold) The reason being that it gives me one big window that I can devide up into smaller terminal windows. That way I can have multiple connections or applications open at the same time.
On the Mac I found a great alterative that does not only offer that same functionality but also lets you tweak and tune your terminal application into a nice place to hang out.
iTerm2 lets you do all the things Terminator does and ads sassy looks to boot. You can customise color schemes, fonts, backgrounds and more, so you can make the terminal behave and look just the way you want it. Mountain Lions ‘FULLSCREEN’ function is actually useful for a change as it turns your iTerm window into a full screen “virtual desktop” that you can easily switch back and forth from in order to get stuff done.
iTerm2 is free and works on most versions of OSX.
Screenshot : My iTerm2 setup on the Mac. A nice Ubuntu wallpaper, light fonts, transparent background, running in fullscreen and connected to 2 of my virtual machines.
Related Posts
kw506 : Sliders academy part 2 : Linux Everywhere.
Mar 13We take up part 2 of our Sliders Academy series and take the Linux system we installed in lesson one a step further. Follow the tutorial and learn how to connect to your Linux machine from any operating system and with multiple users. Build your own terminal server or “slide” from Windows to OSX while taking your personal Linux desktop with you anywere. Using the NX Server and the NX client we slide another powerful tool into your Sliders toolbag.
Shownotes.
- Installing SSH
- Installing NX Server
- Installing the NX Client on Windows
- Installing xQuartz on OSX.
- Installing the NX Client on OSX.
Part one of the series : Installing the Ubuntu system.
Related Posts
"w" The shortest command line command … ever.
May 15Some Linux commands are hard to remember. Its a matter of “use daily or forget about them” or plastering your office walls with cheatcheets of your favorite terminal commands. The one I stumbled upon yesterday was in fact a little easier to remember.
Picture this : you have a home Linux server (or one at work) with several users logged in. One of the things you might want to monitor is who is doing what at this very moment. As I mentioned in a previous podcast about my home setup , I have a Linux system parked “outside” my home network to be accessed by friends and internet buddies. One of the things I do like to keep tabs on is : Who is logged in and what are they doing ? In the old days I would go ” tail -f /var/log/auth.log ” to keep track of the auth.log file that writes down all that is going down on the system. These days i just type “w”. And that’s it.
“w” gives you an overview of who is logged in and what they are doing. Its THAT simple.


