


iDropCloudBox – Bringing iCloud and Dropbox Together
Sep 28This is another guest blogger post on Knghtwise.com, this time from Keith Murray (@kdmurray) who brings us a tip for linking your iCloud and Dropbox accounts.
One of the great things about iCloud is ubiquitous access to your files and data on all of your devices, seamlessly and behind the scenes. There are just a couple of caveats:
- your applications need to support iCloud, it’s not a feature of the OS
- you have to have Apple gear
While the first one can be a bit of a downer when you realize your favourite application doesn’t yet support iCloud, the second one can be a deal-breaker. Those of us who spend our days moving across platforms as easily as most others cross a room will often find that iCloud is less than useless when it comes to synchronizing content across our devices. If only iCloud worked more like Dropbox, maybe we could have the freedom of choice on our platforms and still keep some of the ubiquity across the Apple devices that we do have.
Enter the symlink.
I just did a post on my blog a couple of days back on using Symlinks to centralize content which is scattered about your computer into a nice shared space in Dropbox. It turns out you can do the same with your iCloud documents as well. While application specific, you can synchronize some or all of your iCloud documents to your Dropbox using the same technique I discussed before.
ln -s ~/Library/Mobile Documents/N24PMNAXEV~com~metaclassy~byword/Documents ~/Dropbox/Apps/Byword
All of your iCloud data is stored in application specific folders inside your Library folder. If you want to browse the files you can see them in the Finder:
- Open Finder
- Pull down the Go menu
- Press the option key Click on Library
- Open the folder Mobile Documents
Voila! Your iCloud apps reveal themselves. Each one of the application folders contains a Documents folder which is where your files for that app live.
If you want to be less discriminating you can try syncing all of your iCloud data with someething like this:
ln -s ~/Library/Mobile Documents/ ~/Dropbox/iCloud
If you try this approach, just make sure your Dropbox account has enough storage to take on what you’re giving it. The default free space in iCloud is more than twice the free default in Dropbox. Now go forth and sync your iCloud and Dropbox data!
Keith Murray is a software architect and developer who blogs about technology and science at kdmurray.net. He can also be found on twitter as kdmurray.
Related Posts
Ubuntu 12.04 : Mount that iPad : Play .Avi : No iTunes :-)
Sep 21We are very happy to line up one of our new guestbloggers on Knightwise.com. Its @McVries_ who kicks of the series with a great article on “sliding” from Ubuntu to IOS and hooking up your iPad .. without iTunes .. on a Linux machine.
Ubuntu 12.04 : Mount that iPad : Play .Avi : No iTunes 🙂
iTunes has some disadvantages, and one of them is a rather serious one for any linux user. It just isn’t available. Although some older versions are said to be Wine compatible I have a Windows virtual machine setup to be able to use iTunes (amongst other tasks). But since spotify I don’t sync that much music anymore and for my daily dose of podcasts I’ve dumped iTunes a long time ago. But what about movies? Well, i recently figured out that it’s a lot easier for an Ubuntu user to transfer them to an iPad then for, let’s say, a Mac or Windows user. How? Directly from the Desktop! And in a lot of cases you don’t even need to bother to convert it to a native iOs format. Een .avi or a .mkv plays very well.
The Recipe: An iOs device, in my case an iPad, one USB cable, your computer running Ubuntu and (for example) OPlayerHD Lite (Free as in beer in the appstore).
After connecting your iOs device you will see two mountpoints pop up in your filebrowser. One of them facilitates your photo import and the other one with a name like “Documents from {Username}” is the one we want now. This is the one that will help you ‘inject’ a file in almost any off the applications you have installed on your device. If you open it you’ll see something like this:
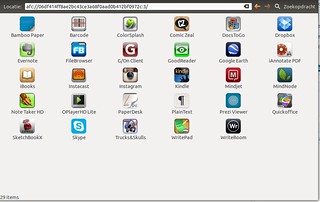
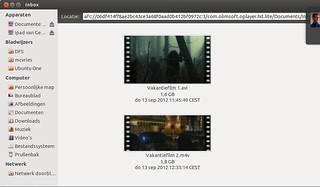
And OPlayer is in there as well. (Why do i use OPlayer? It supports .avi, mkv, and dvd-folders, locally and over the network). Double click it’s icon and finally you’ll find a folder called Documents and a folder “Inbox” within. Now just paste the movie you want to watch and watch it dive into your iPad at an enjoyable speed. Start the applicationon on the iPad, browse to the My Documents folder and Enjoy. Offline!

Some caveats: Copying a 8 GB Matroska (.mkv) would prove to be rather pointless, the iPad isn’t hefty enough i found. Take a more modest one, around 2 GB for 90 minutes and it seems to work well. Avi is no problem at all.
Links : oPlayerHDlite
A post by Guestblogger McVries http://www.mcvries.nl A blog about my experiences using an opensource OS while working as a Windows sysadmin, and being the techno advocate for the organization i work for.
@McVries_ Skeptic IT Manager with a liking for open Source.
Related Posts
kw401 : 'Using Ifthisthenthat to automate your Cyberlife'
Sep 21We kick off season 4 with a great tutorial podcast on how to let the internet work for you. A deep dive into the functionalities of ‘If This Then That’ enlightens you how to tie all of your social platforms together and through automation, have cyberspace work for you.
Shownotes
Related Posts
Size doesn't matter : The 12-inch mobile office.
Sep 20Since we are doing some home renovation over at Casa del Knightwise for the moment, living space is at a premium. While our downstairs looks like its been raided by a group of angry drunken Constructicons, both @Niejana and I need to “flee” to my upstairs office to spend our evenings watching tv and doing stuff. The otherwise pristine (and organised) room is now packed with boxes, our tv, a couch, @Niejana’s desktop , 2 doggies and a cat. Needless to say : Space is scarce. That requirement comes at a convenient time, since I’ve just shrunk down my “Digital survival kit” to the size of a 12 inch messenger bag. Bigger is better ? Not always, let me show you.
What do I need : In order to digitally survive this era of grime and dust I need a mobile setup that allows me to do the three crucial things : Communicate , Consume media and compose content. An added “required factor” is that the setup has to be completely mobile and fit inside a bag that can be carried around ANYWHERE leisurely without yelling “This is a laptop bag, mug me now”

Bag : Finding the right bag is an art. Call me metro-sexual or just someone with a right balance between appreciating both practicality and esthetics : Finding the right bag is crucial. The trick is to find the sweet spot between ” Too small” Where you cannot get all the gear you want into the bag OR damadge your gear by cramming it in. Samsonite’s 12 inch horizontally slung messenger bag is ideal for this operation. It has all the compartments you need and comes with extra padding and a safety latch to keep whatever you need tucked in safely. With the “Horizontal” orientation the weight is distributed equally so the strap doesn’t wear into your shoulder. The extra “Handles” make it easy to grab and sling anywhere you need to while the whole formfactor is just big enough to encompass anything, but small enough to be casual and unobtrusive.
Laptop : My newly purchased 11.6 inch Macbook Air is a dream here. Dual booting into both Linux and OSX the device offers me the 2 platforms that I need in my daily routines. OSX for content production, Ubuntu for advance geek stuff. The 128 gig SSD might be small but with the addition of cloud storage AND using storage on my home server over SSH connections, disk space is not THAT important. The Air is delightfully light, well built and has a great screen. It lacks the “Hussle” of consiously ” getting out your laptop”. With the size of an A4 piece of paper (or an iPad) it just pops on the table, gets the job done and slides back in the bag when i’m done.
Phone : The pinnacle of communications here is my smartphone. The 16Gig iPhone 4 might not be the top of the line model, but it does preform the tasks it needs to do. With the Hootsuite and the Google+ app most of my social media channels are covered. I’m tied in to my multiple email and calendar accounts via the mail app. Aside from the music, Downcast takes care of my podcast subscriptions and the Webbased interface of Google Reader together with the Buffer and the WordPress app let me do most daily chores for the website. Crucial here is the presence of headphones (so I can “Zone Out” anywhere) and the “Hotspot” functionality turns it into a crucial component to “connect” the entire setup while on the road.
Tablet : The Google Nexus 7 proves to be invaluable when it comes to this “Compact but Crispy” setup. It’s 7 inch size and relatively long battery size help me get through the day with ease. Reading books, Doing my “communications” on a bigger screen and watching the downloaded Video Podcasts are just cut out for the Nexus. An extra “slide right in” protection sleeve and the vertical orientation of the tablet in the bag, make it great to “grab and check” your device in a tricorder style. The only downside is the smaller ‘diskspace’ (8 gig) and the absence of 3G. But the latter is easily overcome by using my iPhone as a hotspot.
Cables and chargers : The trick here is to have the smallest amount of cables with you, while still covering all the bases.
- Macbook air Charger (with just the plug connector, not the long cable)
- Apple iPhone/iPad cable : Used to charge the iPhone using the Macbooks usb port.
- Usb Microsim cable : Used to charge the Nexus (from the Macbooks usb port.)
- Usb charger : Small usb charging plug to wallcharge the iPhone / Nexus
- 16 gig Usb stick : Small and compact but packing 5 extra “Live” linux Cd’s to have any OS I want at my portable disposal.
- iPhone Tripod : A little tripod to make sure I can use my iPhone as a one man camera crew in a pinch.
- In the car : The trick of such a compact setup is to make sure you have some “extra’s” nearby. So in the car I have a small bag with a longer powercord, a Usb to Ethernet adapter, a network cable and an iPhone / iPad charger just in case.
Related Posts
Ditch iTunes and your whole desktop with Doggcather and Downcast
Sep 18 The one thing I’ve always detested when it came to using my mobile devices like my iPad, my iPod Touch or my iPhone (or any “smart device” for that matter) was that you needed to “link” it to your desktop. If you think about it, behavior like that is something you might expect from a Palm Pre (or Apple Newton for that matter) But having a device with 7 antennae (antenna’s ?) require a serial connection to get stuff moved over to it .. It’s too 90’s for me.
I have spent considerable time in bypassing this crippled way of working by writing up special scripts , ssh connections and cronjobs to “ditch the cable”, but I continued to start out from the assumption that the desktop needs to acquire the data (podcasts, music, etc). But what if we let go of that paradigm altogether ?
Enter the mobile podcatching client. On IOS devices creating an application for this purpose has long been considered blasphemous : It “Duplicated” functionality that was native to iTunes. I am unaware what prescription of brain numbing meds the person that made that statement but for the longest time there was no “podcatcher” on IOS.
Luckily that has changed with “Downcast” : A full fledged podcatcher that has all the bells and whistles a stand alone application like this requires. Its very easy to search for podcasts or subscribe to them manually. You can set the number of episodes to keep and to delete. You can choose what to download , when to download it (over what connection) Thanks to location based services WHERE to download your stuff. While playing back audio en video podcasts you can choose the speed, pick up where you left of and tweet what you are listening to. The best thing is you can control all of these settings on a general or per-show basis. For the hilarious amount of 2 dollars you get a good working iPhone/iPod version AND the decent iPad version of the application. Downcast was surely built by people who knew exactly what a mobile podcast-consumer needs to keep him happy.
On the Android side of the pond “Doggcatcher” comes in at a slightly higher price point of 5 dollars but it offers almost the same magic as downcast. One of the added advantages of Doggcatcher is that you can create “Internal” podcast feeds. Mark a couple of files on your SD card into Doggcather and it will treat them as an external source of content. This is VERY handy if you want to listen to an audiobook you downloaded elsewhere and have it play nicely in your podcatchers interface, giving you a nice view what chapters you listened to and which ones you need to get to.
Both applications have, for me, severed the last ties between my iPhone to iTunes and have given extra independance to my Nexus tablet, letting their technolgy “work for me”.
Links : Doggcatcher. Downcast.
Cross platform compatibility : Ios – Android.