Get the audio from a Youtube video with one command.
May 02By now most (if not all of you) have dabbled a little bit with Linux. Although it might look geeky and complicated at first glance, once you dip your toes into the great lake of open source it becomes a very refreshing computing experience. How do I mean ? Well : I challenge you to the following : Take a Windows Machine OR a Mac and, within 2 minutes FIND and INSTALL a free application that allows you to download a Youtube video and extract the audio to MP3. If you started off your search in Google (or in the Mac App store for that matter) you are starting to realize it is not that easy. There is a ton of ‘supposed’ freeware out there that, after installing it gives you either an app that does not completely work (unless you pay for it) or is just too complicated. Do you (as a true slider) have a Linux machine handy ? (perhaps a virtual machine or a server ) Then lets fire up the command line and give you a one line command to make that technology work for you.
Introducing “Youtube-dl”
Youtube-dl is a command line application that lets you download Youtube video’s and if you want to, extracts the audio from said video’s. The command is simple. On Ubuntu you can install it by hitting :
sudo apt-get install youtube-dl
After the installation is complete you need to update the app to the latest version. Also .. a couple of one liners.
sudo youtube-dl -U
You will get an error that you need to update via the GIT repositories once more. Easy peasy (copy and paste people)
sudo wget http://youtube-dl.org/downloads/2013.05.01/youtube-dl -O /usr/bin/youtube-dl
sudo chmod a+x /usr/bin/youtube-dlLets start Downloading.
Now surf to the Youtube video of your choice and copy the url to your clipboard.
Go back to the terminal and type :
youtube-dl <paste your url here>
Presto ! You will have the youtube video all for you ! What if you want the audio ?
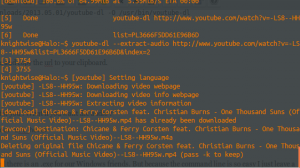
youtube-dl --extract-audio <paste your url here>
Cross platform compatibility
Youtube-dl is also compatible with Macs and there is an .exe for our Windows friends. But because the command line is so easy I just leave a terminal open to my linux machine (on ANY machine i’m working on) and just copy and paste whatever cat video I would like to keep for prosperity. And youtube-dl does also support tons of other video sites like Vimeo and more !
Links : the Youtube-DL page. and their howto for Windows and OSX users.
Related Posts
Find focus by building your digital Zen-Zone.
Apr 30 After our home renovations I found myself forced to move my office to the attic of our house. It was time to tear down the carefully constructed nexus my digital lifestyle up one level. But it was also time to think things over on how I wanted stuff to be set up. Where my old desk was arranged in a C-shape, surrounding me with multiple monitors and computers, all available with a smooth swivel of my chair .. my new office was a “one line setup”, stretching out the entire length of the workspace in a single row. This meant it would be impossible to use the setup with just “one chair”, in essence creating more then one workspace. What now ?
“Comfort zone”.
I decided to do things differently this time. My multi-monitor-multi-media workstation with its 2 massive 24 inch displays, its mixers, its speakers and all the other gadgets would be sprawled onto one “desk” and .. I would leave the other desk completely empty. Instead of packing it with screens and keyboards, a little lamp, a wireless mouse and a collection of power and network cables was al that was visible on the workspace. This “second desk” is the one I want to use when the countless windows and digital clutter are getting out of hand. I just pop down here with whatever laptop I’m using (My Mac, My Linux machine, My work laptop) to get things done. I just sit down, hook up and focus on what I’m doing. Distractions are few because .. its just a cosy little corner .. opposed to a Nasa style multi-display supercluster.
“Zen Zone”
But just a “different spot” is not enough. One might still be bombarded by digital distractions like eMail, Social media and so forth. So I created a different user profile on my laptop (s) that I call the “Zen Zone” A profile that does not have IM or eMail clients configured. Just the bare minimum will suffice. Access to a browser, word processing apps, whatever I need to get stuff done .. but ONLY that. If I really wanted to I could remove the admin rights to this profile, change the proxy settings and make sure that my “Zen Zone” would be unable to access the internet unless I reboot. It might be tricky to do so when you work in the cloud a lot, but when you need to “get down and dirty” with something you need to get done .. this might help you with your self discipline. You need to “log out” and “log back in” to a different user if you want to go online. This will surely help in controlling your impulses to “quickly browse the web”.”
“Zen-ware”
Especially when it comes down to writing or being creative, having as few distractions as possible does help a lot. There are a number of applications that help you do this. Taking away all the bings bongs and chimes from the busy desktop interface and just giving you a plain interface. Ommwriter ( Windows, Mac, Ios) or Focuswriter (Linux and Windows) are great ways to find a tranquil slate of screen to do your thing. Finding an online pomodoro timer might also help you keep your Cyber-ADD in check by giving you a focus-countdown timer with rewards when you completed a task.
In the end it comes down to a little self discipline and letting technology work for you instead of getting in your way .. to get stuff done. So : What are YOUR tips and tricks to stay focused and not goof off all the time ? Tell us in the comments section.
Related Posts
kw506 : Sliders academy part 2 : Linux Everywhere.
Mar 13We take up part 2 of our Sliders Academy series and take the Linux system we installed in lesson one a step further. Follow the tutorial and learn how to connect to your Linux machine from any operating system and with multiple users. Build your own terminal server or “slide” from Windows to OSX while taking your personal Linux desktop with you anywere. Using the NX Server and the NX client we slide another powerful tool into your Sliders toolbag.
Shownotes.
- Installing SSH
- Installing NX Server
- Installing the NX Client on Windows
- Installing xQuartz on OSX.
- Installing the NX Client on OSX.
Part one of the series : Installing the Ubuntu system.
Related Posts
Bohdi, ONE linux distro for your Netbook, Nexus, Mk802, Chromebook and Raspberry PI.
Feb 02With all the great feedback we have been getting on the last podcast episode ” Return of the Netbook” we have gotten quite a few Knightwise.com fans asking “What would be a good distro to pick”. Yeah sure there are plenty of *buntu or Debian based versions of Linux out there with a very light desktop interface. But most of them are based on Lxde or Xfce. The downside with these graphical skins is that … everybody else has them too. And you want to stand out .. right ? So not only do you want to score hordes of fans in the geek world (and the oposite or same sex) with your flaunting walk as you ‘stride’ through the shopping mall holding your Netbook .. You also want something that no-one else has… Yet.
If in need of an original spin on the “light linux desktop” you might want to go for Bodhi Linux. It features an “Ubuntu 12.04 LTS” underground topped off with an Enlightenment (or E17) desktop and a pretty look and feel. I would describe the extra features of Bodhi as ‘added icing’ , but that would make this article resemble a Culinary cupcake review.
Not very impressive I hear you say : But wait ! Bodhi is also available for your MK802 AND your Chromebook your Google Nexus AND your Raspberry Pi ! Talk about one OS to rule them all !
Download the 32 of 64 bit versions of Bodhi here. If not satisfied with the results, pimp it just the way you want it and make it into their “Desktop hall of fame”.
First listener who posts a pic in the comments section of HIS desktop/chromebook/stick/pi/kitchen sink running Bodhi, wins the Geek-of-the-week badge !
Related Posts
Wordgrinder takes you back to the (productive) days of Wordperfect.
Jan 29I mentioned a couple of interesting command line suggestions for a good Wordprocessor a while ago in a previous post. But thanks for the research I did for the “Return of the netbook” podcast, I came across Wordgrinder. Unlike most word processing applications from Redmont, Wordgrinder is not infested by a talking paper clip, and its menu bar has not been designed like a hidden Chinese puzzle that only Savants can solve.
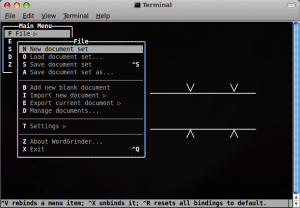
Wordgrinder is also a different league from the text editors like VIM or Emacs, and is not geared towards code manipulation like Nano. Wordgrinder reminds me of .. Wordperfect. Remember the little paper strip secretaries had taped to their keyboards in order to remind them what function key did what ? Wordgrinder is more like that. Hitting the escape key brings you into the menu bar where you can select all the functions you expect from a real Wordprocessor… from the early Nineties.
But in a world swamped with widgets, buttons and distractions, in a universe where every application at least has one dingdong to tweet whenever you even THOUGHT about farting in the elevator .. Wordgrinder is safe haven of simplicity and focus. Run it natively on any Linux system or access it via an SSH connection to your Linux system from your Mac or your Pc. Sure it isn’t high tech, but it does the job pretty well. For all those times you need to knuckle down .. Wordgrinder is your friend.
Install it from the command line (On Ubuntu)
sudo apt-get install wordgrinder

