What is this article about.
If you where to sum up every article about the “ultimate” setup of a Linux server, one would be here for years to come. Lets face it : There is a ton of documentation out there about configuring and installing the perfect server so why in hells bells would I write my own. Well, for one : Because I can make heads or tales of most of them. Although they are all nicely copy-paste I seem to find unknown dummie-like mistakes that blow the minds of even the dumbest of people. So its time to turn the tables on technology and instead of us working for IT , we let technology work for US for a change. So I’m going to draw up a little multi-step how to in building your own Ubuntu Server . And no ISP like mega machine that is powerful (and complicated) enough to take over when Gmail goes down. No , Its gonna be a simple server for the family that will be able to preform the tasks that a small group of of people need, PLUS giving you the tools to configure it simply and remotely.
What tools do we use and why
But before you think that its going to be one of these cut-and-paste command line manuals that seem to feel like a straitjacket, leaving you completely helpless when you fail. We are going to go for the somewhat more user friendly, graphical and practical approach. Mixing in some command line stuff, point and click stuff with webmin, and some more tinkering using simple programs like Filezilla. If we need to we’ll even kick in the graphical user interface on our little server. If it serves us right ;). But mostly you’ll be operating and configuring your server from your own workstation or even across the net. But we’ll get to all of that later.
Choosing your hardware.
The hardware you choose for your family server could be any old clunker you have lying around. The amount of memory and the processor you need depends on the number of users and the things you want to do. So don’t go cheap and cough up a Pentium 1 pc, go for last years “hand me down pc” from your sister or something. You can put a big hard disk in it for using it as a file server. But don’t worry, you can also hook up an external USB drive for extra storage. For this example i’m using a PIII 500 with 256 megabyte ram. (for about 5 users that will do) You can use a keyboard and a monitor if you want to work on the system localy but you don’t need to. Its gonna be a headless box stuck in the basement, hooked up to your network. You’ll be in control of the system from the cosy comforts of your own office and the family can reap the benefits of your work.
Installing your Feisty fawn server.
 I’m going with a server install of the latest version of Ubuntu because it comes packed with a nice extra : Without the graphical GNOME interface of the default Ubuntu version its lighter and more suited for “server tasks” (Dont worry , if we need the GUI we’ll install it AND we’ll be able to switch in ON and OFF when we want to) Plus there is of course the fact that the Feisty server comes with APACHE ( a web server ) Mysql and PHP. Now it might not mean a lot to you right now but believe me, you will be happy to have those babies pre-packed when you need them.
The Basic install of Feisty Fawn is pretty simple.
Download the server version of Feisty here. http://www.ubuntu.com/getubuntu/download
Burn it to a cd and pop it into your server. In order to install it i’ve found a great how to in installing your server. Don’t freak out cause we are only going to need step one and two of “mr. perfects” ultimate install. So don’t worry. Take the first two steps of this PERFECT install but when asked to configure the network choose MANUAL . Give your IP / Subnet and Default Gateway. Before its all done be sure to select LAMP when the option presents itself.
Click here for “mr perfects” manual on installing your server. http://www.howtoforge.com/perfect_setup_ubuntu704
Installing SSH.
SSH is a secured connection between one computer and the other one. And with secure we mean no one can snoop into whats going back and forth. We’ll be using SSH to remotely administrate the server AND give you a secure and easy way get full access to the files on the server. So before we begin download FILEZILLA and PUTTY . Putty will give us remote shell access, Filezilla will be our “file explorer” over SSH. On your server, Login using the user name and password. Be sure the server is hooked up to your network (and of course the internet) and punch in the following line.
apt-get install ssh openssh-server
When this is done you can pack up your server and park it in the basement for all I care. Just be sure you have it hooked up to your network.Next : Feel the power of remote domination as you fire up putty on your local (windows) machine (Mac and Linux machines have SSH shells of there own) and connect to your server : ssh YOURUSERNAME@IPOFYOURSERVER you’ll be asked for your password and thats that .. you are now in full control of your system.In the next step we will tinker with the sources list of your Ubuntu server. This just means that it wont nag you for the cd anymore and open up access to some more software repositories. In order to do this type
Sudo nano /etc/apt/sources.list
Comment the line that mentions the CD as a source for software with a # #deb cdrom:[Ubuntu-Server 7.04 _Feisty Fawn_ – Release i386 (20070415)]/ feis… and remove the # from the lines that refer to “universe” and “multiverse” repositories. Next add the following line : deb http://download.webmin.com/download/repository sarge contrib
Hit CTRL and X when you are done and save the file. Now just type sudo apt-get update and and
sudo apt-get upgrade This way all the software on your server is up to date.
A whiff of webmin.
 Time to give some power to the browser. Sure Putty and the remote shell is a great way to interact with your server, but hey , you didn’t configure your wifi router over the command line now did you. So its time to install webmin . A web based configuration tool that will let you do your thing using your browser. First up open up your putty and connect to your server over SSH. Now I hear your fear my friends : “Oh my ! We are going to install webmin using the command line. All that Tar and Untarr stuff makes my skin crawl.” Dont worry buddies, its gonna be easy as pie.
Because we entered the webmin repository in our sources.list file you can just type sudo apt-get install webmin
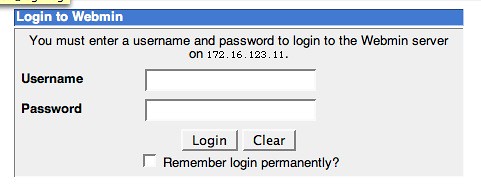
With webmin installed lets bring the baby up to speed.Login to your Ubuntu server using your browser. https://IPOFYOURSERVER:10000 Enter your password and user name (the same one you use for the SSH connection).

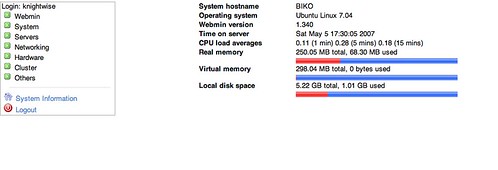
After logging in you will get a nice overview of the “status” of your server. It shows you the drivespace that is available, the free memory and all that. Kind of a dashboard that lets you see how healthy your system is.

The first thing we do is make sure we UPDATE all of the webmin-components to their latest versions.
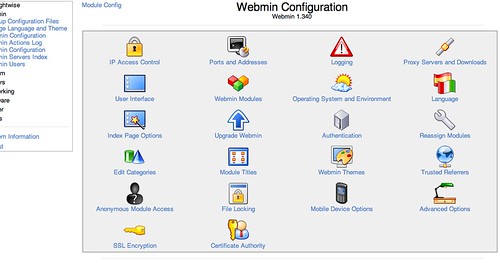
To do this click on WEBMIN / WEBMIN CONFIGURATION in the left column.Then click on the UPGRADE WEBMIN icon.
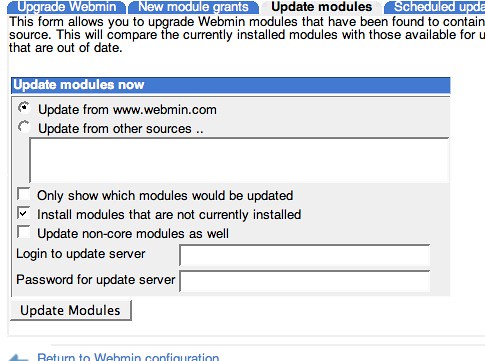
In the first tab click “UPGRADE WEBMIN” it will probably come back with the error that you already have the latest version, but still. Then in the Third tab select “update modules” Make sure only the checkbox with “install modules that are not currently installed” is checked and click ‘update modules‘.

Groundwork Completed.
With that the groundwork of your little “server for the family” has been made. In the next chapter of this manual we are going to setup the server as a file and print server using SAMBA in order for you to use the Feisty Family server as a Feisty Family Fileserver.
