Part ONE of this manual on how to setup your server and Install webmin, can be found HERE.
Part THREE of this manual : Installing Torrentflux can be found HERE.
In part one of this manual I showed you how to install your Ubuntu server for the family, setup SSH to connect to it remotely and setup webmin. Well, its all nice and dandy to have a server running and all that jazz, but now its time to actually let it WORK for us. And aside from a good virusscanner and a geek-of-the-house, what does a family network need the most ? Right : Filesharing. A server that gives every user the option to store his or her files securely and have a place to swap files around. So time to set up your “Feisty Fileserver for the Family”.
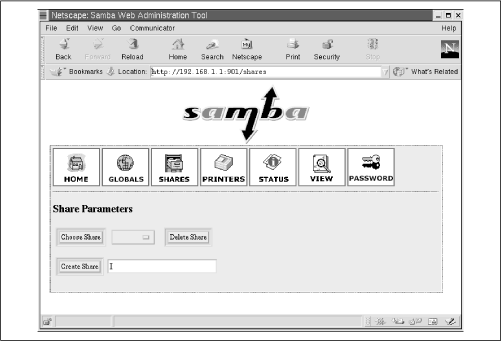 Once again : When I wrote this manual I had the average family geek in mind. So the methods and techniques I will use will probably differ from the “standard” approach and even get Die Hard Linux fans to foam at the mouth with anger and frustration. But all of this is done with a simple setup in mind. Making a simple fileserver for the family. In reach of simplicity I may have have given up a little “security” but its a home server we are talking about. A home server in a Home network of Home users and all that jazz. So chill out ! Its not like its gonna hook up 5000 users and have the entire Russian Hacking Federation after its pink little ars ! Sharing files with Samba has been something I have been trying to do for quite some times. But if you even mention the fact of filesharing to Linux guru’s they are all over you with their Samba Config Files which they INSIST that you learn by heart. If you want to share a single folder they force the whole philosophy and history of Linux filesharing down your throat. It seems like there is NO simple approach. You just HAVE to be able to recite the entire Samba config file backwards from memory.. before you can even start doing all this crap. I personally don’t believe in this method. Its too complicated to start out with and users just give up. So i’m gonna get you guyz GOING on the road of filesharing by making a simple file server. And if you like it and want to learn more you can do the whole config file editing thing until you are blue in the face. Untill then.. Lets get started. (click on READ MORE to get the whole screeshot by screenshot manual).
Step One : Install Samba.
Time to connect to our server using Putty or our favorite SSH shell client (terminal in Mac and the Terminal in Linux for example) in the way that was described in part one. Once you are in type the following command (or copy paste it for all i care) sudo apt-get install samba smbfs This will install Samba on your server.
Next its time to configure our webmin interface to play nicenice with Samba. Go to your browser and connect to your Feisty server with the Webmin URL (see part one for details). Next, in the left column, click on SERVERS/Samba windows File Sharing. If the webmin component to control Samba is not installed, you can click on the link to download and install it). If that is done you will see this.
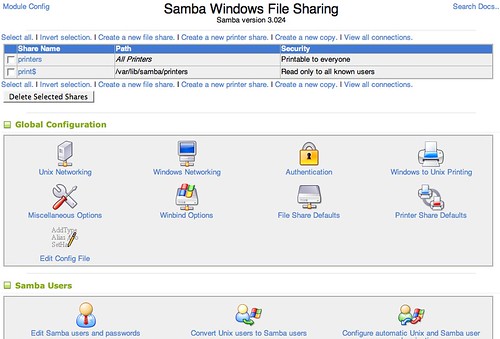
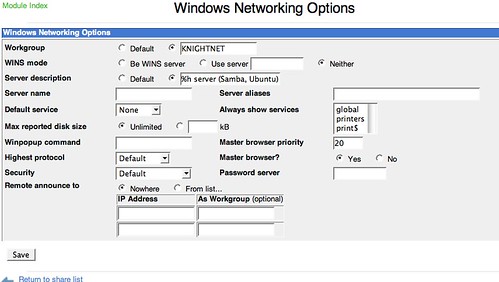
Next we are going to shove our little Linux server into our Windows workgroup. To do this click on WINDOWS NETWORKING and enter the Workgroup name that you are using for your windows computers. Click save.
With the workgroup all setup its time to enter the users. The only thing you need to remember is that there are two kind of users we need to worry about. First of all we have UNIX users, these are user accounts on your Ubuntu server. These people can log in and have access to the files using SSH or the keyboard connected to the server. Don’t worry about mom and dad fracking up the server this way. They don’t have a program like putty, can’t access the server locally and are probably scared shitless of the command line interface anyway. (and even IF they log in as a unix user they cant do anything cause they have plain user privileges). Apart from Unix users there are SAMBA users. These are the users the Samba file sharing protocol recognizes. To keep things simple lets just say we need to design some Unix users and turn them into samba uses. That way users can access the shared folder over Samba and read an write to the files on the UNIX system. For the purpose of this manual i’ve drawn up some simple usernames and passwords. You can of course make up your own. The most important part of setting up these users is that, this way, each user has his own personal home directory that cannot be accessed by anyone else (but you .. cause you are “root”)
username / Password.
mom/mom
dad/dad
brother/brother
sister/sister
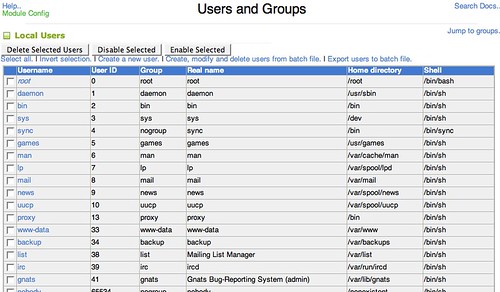
Lets start by setting up our users as UNIX users. To do this go to SYSTEM/USERS AND GROUPS
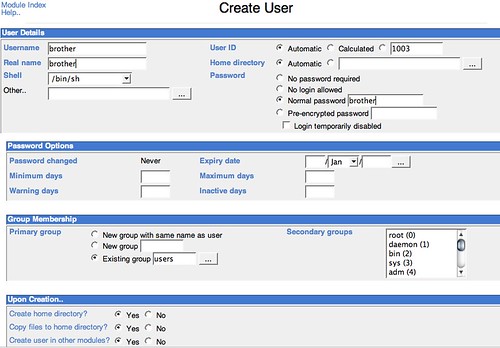
Click on create a new user / Choose username / Choose Real name / Click NORMAL PASSWORD / Choose password.
Now its time to convert our Unix users to Samba users. To do this click SERVERS/Samba Windows File Sharing and next click on CONVERT UNIX USERS TO SAMBA USERS.
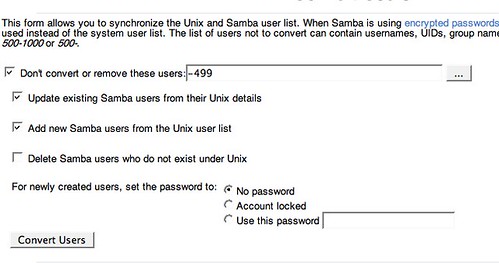
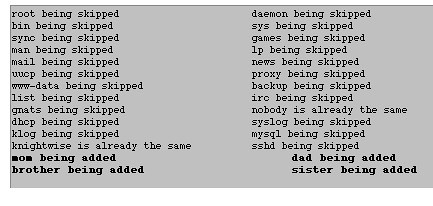
Choose convert users. You will see that all of your users are converted. (make you feel like some TV preacher ! Converting people like that)
Now our little conversion has only carried over the user names. We need to provide Samba with the passwords to our accounts. To do this click Edit Samba users and passwords. Now click on one of the accounts you have created. (lets take ‘mom’ as an example).
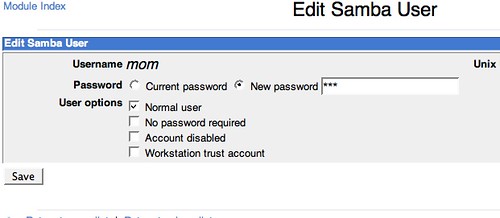
Click on “NEW PASSWORD” and enter the same password we used when we created “mom” as a Unix user. Do this for all users and go back to the SERVERS / SAMBA window.
Sharing the Home directories.
Ok , The personal accounts are all setup so its time so assign every user a Home Folder. A personal share where only he or her has write acces to. To do this, click on CREATE A NEW FILE SHARE in the main Samba Window. Choose “Home Directory Share” and click CREATE.
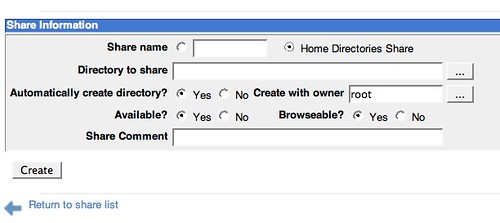
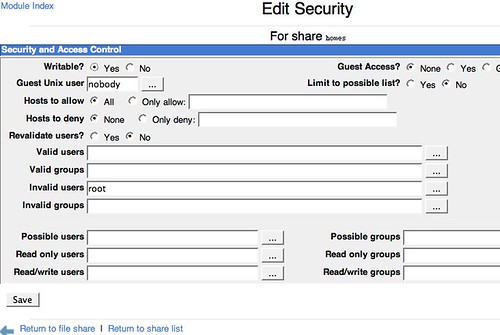
Back in the main Samba window , click on the HOMES share to edit the security privileges. Choose SECURITY AND ACCESS CONTROL and set the radio button on WRITEABLE. Next click save and save and that is done.
Creating a public Directory.
And finaly we are going to make a public directory for all users to read and write to. Before we dive into the sharing part we need a folder TO share. In order to do this open an SSH connection to your server (described in part one of this manual).
Type the following.
cd ..
pwd ( the output of this command should read the directory you are working in , it should read /home )
sudo mkdir public (this will make the directory called “public”)
sudo chmod 777 /home/public (this way all the users will be able to read and wrie to the directory)
exit.
Back to the Webmin webpage. In our main SAMBA configuration page we once again click CREATE NEW FILE SHARE. Enter the share name (public) enter “/home/public” in the DIRECTORY TO SHARE and set “AUTOMATICALLY SHARE DIRECTORY ” to NO. If you want to you can add a comment on for the share.
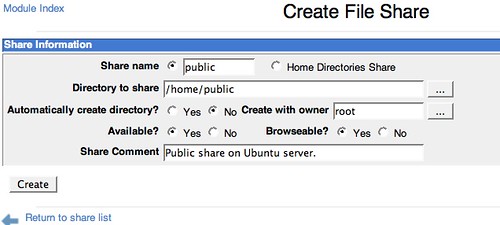
Now Choose Create and do the same thing with this share as we did with the home shares : Setting them write enabled. (see above).
Logging in from the Windows Machines.
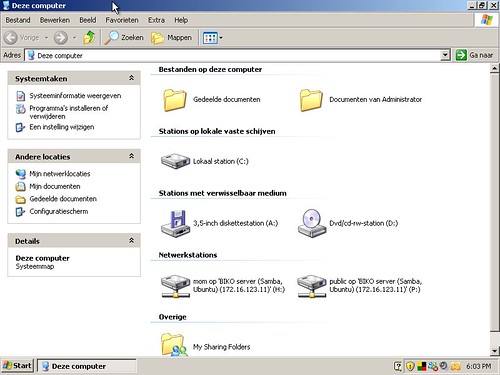
Now in order to hook up your users let them log in on their windows machines and open the windows file explorer.
To map the home drive
- Click on my computer
- Choose map network drive
- select the H drivetype
- //IPOFYOURSERVER/MOM
- Choose “remember connection at startup”
- When asked for username and password : provide the samba username and password
- Choose “remember password”
Map the public drive.
- Map the home drive
- Click on my computer
- Choose map network drive
- select the P drive
- type //IPOFYOURSERVER/public
