Some gadgets are just hard to throw out. Perhaps you keep hanging on to them because you have this plan of “using them someday” for “some project”. Perhaps you keep hanging on to them because of nostalgia. Whatever reason you might choose, those geeky gadgets that keep occupying that box in your office aren’t getting any younger. Why not put them to good use ?
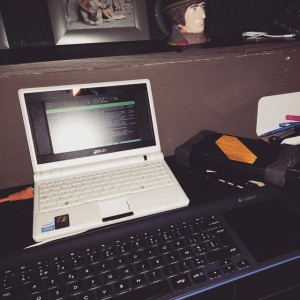
Lets take 2 items in MY junk-box as an example. An aging Asus EEE 701 Netbook PC that I have been hanging onto because of sentimental reasons. (I smuggled it in from the US way before these babies were available in Belgium) Its keyboard is broken and its low specs when it comes to storage, memory and cpu power aren’t helping it in finding something useful to do these days. The second item is my first 1tb external hard drive. I haven’t thrown this one out because its on my ‘for-some-project-some-day’ list. Its been on the list for 2 years now … So lets smash them together and turn them into a Remote backup solution using open source software and Bittorrent technology.
Step 1 : Turn the EEEpc into a headless server.
I downloaded the Image for Ubuntu’s ‘minimal installer’ off the net and have had it kicking around on an old USB stick for a while now. Because of its small footprint its ideal to do ‘light’ installations of Ubuntu because you can choose which components you want to install. I chose the ‘minimal Ubuntu server’ and the SSH server component. When the installation was complete I rebooted the laptop and hooked up the external USB drive (that I had formatted in one big FAT32 partition)
Step 2 : Install Webmin and mount the drive.
Because I was going to use my external hard drive to store my remote backups on (the EEEpc doesn’t have enough storage) I needed to be sure it was always mounted correctly if my little laptop should have to reboot. So instead of messing around with stuff like FStab config files I installed Webmin. (a Web-based interface to your Linux server). Using the ‘Disk and network file system’ menu I mounted the external drive into a folder called ‘backup drive’ that I had created in my home directory. This way I was sure that the external drive was always mounted correctly in the same folder.
Links : Howto install Webmin.
Step 3 : Install Bittorrent Sync.
Next up I installed a copy of Bittorrent Sync both on my local server and on the old eeePc. Following THIS tutorial lets you install Bittorrent Sync and configure the Web interface to be accessible from all over your network. (So make sure you choose a very secure administrator password). When installing Bittorrent sync this way, you are also sure the service always starts up when your computer reboots.
Links : Howto install Bittorrent sync.
After the installation was complete I surfed to the Bittorrent web interface of my home server (source system) in one tab, and to that of my EEEpc (remote destination system) on another one.
Step 4 : Share a folder on your Source system.
Now it was pretty smooth sailing. On the Bittorrent web interface of my SOURCE machine I made a bittorrent share of each folder I wanted to backup remotely. I right clicked “properties” once the folder was created and copied the ‘READ ONLY’ secret.
Step 5 : Enter the key for the shared folder on your remote destination system.
Next up I went to the tab of my ‘remote destination system’ and entered the READ ONLY key. I selected a folder on my external drive where the files needed to be synced towards. (in my /home/backupdrive/ directory)
Step 6 : Do the initial copy
After repeating the process above for all the folders I wanted to ‘sync remotely’ I just had to wait for the initial copy to complete. After that it was time to pickup the EEEpc and the External drive and bring them to their new (remote) home. I hooked the EEEpc up to the network, started up the machine and … that was that … headless remote backup solution done.
Epilogue.
Because Bittorrent sync doesn’t care about open ports or anything I didn’t have to mess with the router on the remote end of my backup solution. There were no ports to forward and even a static IP was not required for the remote machine. Just connect it , fire it up and .. boom. Using the ‘read only’ secret is an insurance that changes to my files are only synced one way : From the source to the remote system (and never the other way around).
You can expand this setup (and increase the security at the remote end) by syncing over encrypted ZIP files. That way people can’t access the data should your system be compromised.
In the end its a great simple way to use an old system (you can even use an old laptop with a broken screen for this) and give it a new lease on life. The setup is simple, the interfaces are web based and the whole setup is perfect for a remote backup destination at your parents or in laws.
So secure your data and put those old clunkers back in action !

