Point the Way Home: DDNS with Linode
Aug 02Guest Blogger: Keith Murray
Earlier this year I switched my web hosting from my long-time account at DreamHost to a fancy new VPS at Linode. I really did enjoy my time with DreamHost, but what I wanted out of my hosting provider had changed somewhat. I was looking for full control of a machine in the cloud. Although DreamHost does offer a VPS option, the pricing options just didn’t compare with what Linode was offering.
I also took the opportunity to move my domain registrations over to Hover, but more on that another time.
With my Linode account managing the DNS for my domains I was able to point a a single subdomain back at the IP of my home network, effectively giving me a nice publicly accessible domain from within my network. This worked well until my ISP changed the IP address I had. Admittedly this doesn’t happen often, but it always seems to occur when I actually need to make use of this remote connection, and with no knowledge of my new public DHCP address it’s pretty useless.
Enter DDNS.
With some modifications to a script I found on GitHub I was able to quckly set up job to check my public IP address and update the DNS records at Linode using the Linode API. I hacked apart the original script and put together my own DDNS update script, suitable for automating.
By scheduling the script to run using a simple crontab entry I can rest assured that every night, while I’m asleep, my server will be connecting to Linode to point the way home.
Keith Murray is a software architect and developer who blogs about technology and science at kdmurray.net. He can also be found on twitter as kdmurray.
Related Posts
kw606 : Making your Mac cross platform friendly.
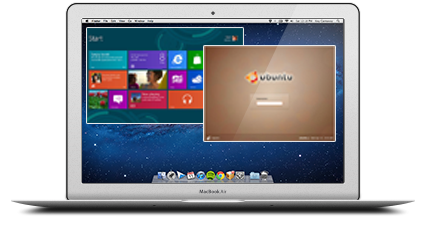
Jul 06 We dive behind the microphone and give all of you Apple users a slice of pie you don’t want to pass up on. We talk about making your Mac “Slider” friendly and how to put up ladders and crawl out of Apple’s walled garden. We have quite a slew of interesting tips and tricks on how to run “cross platform” applications, files, filesystems and connections through your favorite Mac. Learn and listen to this episode of the podcast that is filled to the rim with community feedback and contributions and great music by Youtube princess Juless.
Shownotes.
- Why ?
- How to get started.
- Remapping your brain and your body.
- Desktop enhancements.
- Loginox.
- PathFinder.
- iTerm
- 20 Best command line hacks.
- TextWrangler
- QuickSilver
- Crashplan
- Make executable scripts on OSX.
- Cross platform applications.
- Use Virtualbox in Seamless mode.
- Web tools.
- Online Photoshop Pixlr
- Macports.
- Cronnix.
- Dropbox
- Bittorrent Sync
- Macfuse
Tweak code (Copy and paste in your OSX command line)
#make dock appear instantatiously
defaults write com.apple.Dock autohide-delay -float 0 && killall Dock
#don’t reopen every file when you reopen your app.
#in preview
defaults write com.apple.Preview NSQuitAlwaysKeepsWindows -bool false
#in quicktime
defaults write com.apple.QuickTimePlayerX NSQuitAlwaysKeepsWindows -bool false
#kill the dashboard
defaults write com.apple.dashboard mcx-disabled -boolean YES
killall Dock
#show the path in the finder
defaults write com.apple.finder _FXShowPosixPathInTitle -bool YES
#disable window animations
defaults write NSGlobalDomain NSAutomaticWindowAnimationsEnabled -bool false
#enable direct scrolling
defaults write -g NSScrollAnimationEnabled -bool NO
#no more bouncy windows when scrolling
defaults write -g NSScrollViewRubberbanding -int 0
#set time machine backup to 1800
sudo defaults write/System/Library/LaunchDaemons/com.apple.backupd-auto StartInterval -int 1800
#force expanded save-and-print dialogs
defaults write -g NSNavPanelExpandedStateForSaveMode -boolean true
defaults write -g PMPrintingExpandedStateForPrint -boolean true
#no 3d-glassy dock
defaults write com.apple.dock no-glass -boolean yes
#show hidden files in finder
#defaults write com.apple.finder AppleShowAllFiles TRUE
#killall Finder
#3d glassy dock
defaults write com.apple.dock no-glass -boolean no
#make hidden app icons semi transparent
defaults write com.apple.Dock showhidden -boolean yes
#create a ‘recent items’ stack
defaults write com.apple.dock persistent-others -array-add ‘{ “tile-data” = { “list-type” = 1; }; “tile-type” = “recents-tile”; }’
#screen grabs in jpg
defaults write com.apple.screencapture type jpg
- Music by Juless
- Feedback by Mr Gadgets and Matt McGraw
- Join the community on Google+
Related Posts
Get the command line in Google Chrome.
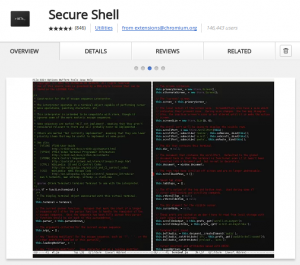
Mar 16We have told you plenty of times about the cool things you can do from the Linux command line. From building your own backup script to using an encrypted SSH tunnel at work to chat to your buddies on IRC on your remote EEE-pc that you glued to the underside of your kitchen tablet at home : There is nothing the command line cannot do. As a slider its always important to have that command line with you, where ever you are. So instead of lugging around a Usb thumbdrive with Putty on it, or fighting the terminal app in OSX .. Why not put it in your browser ?
“Secure Shell” is a great chrome extension that does just that. An SSH Client in your browser enabling you to connect to any machine running an SSH server (Your Mac or your Linux machine at home) Its super light, fast and moderately functional (it doesn’t come with ALL the bells and whistles, but hey). The cool thing is, because Chrome syncs your settings and extensions on any machine, you have that shell with you anywhere. So I’ve locked the tab with the Secure Shell extension on my browser bar and have the same command line interface on any system I use, should I need to connect to a remote system. Its free and slider friendly. Just the way we like it.
Related Posts
kw506 : Sliders academy part 2 : Linux Everywhere.
Mar 13We take up part 2 of our Sliders Academy series and take the Linux system we installed in lesson one a step further. Follow the tutorial and learn how to connect to your Linux machine from any operating system and with multiple users. Build your own terminal server or “slide” from Windows to OSX while taking your personal Linux desktop with you anywere. Using the NX Server and the NX client we slide another powerful tool into your Sliders toolbag.
Shownotes.
- Installing SSH
- Installing NX Server
- Installing the NX Client on Windows
- Installing xQuartz on OSX.
- Installing the NX Client on OSX.
Part one of the series : Installing the Ubuntu system.
Related Posts
Wordgrinder takes you back to the (productive) days of Wordperfect.
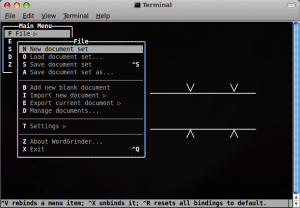
Jan 29I mentioned a couple of interesting command line suggestions for a good Wordprocessor a while ago in a previous post. But thanks for the research I did for the “Return of the netbook” podcast, I came across Wordgrinder. Unlike most word processing applications from Redmont, Wordgrinder is not infested by a talking paper clip, and its menu bar has not been designed like a hidden Chinese puzzle that only Savants can solve.
Wordgrinder is also a different league from the text editors like VIM or Emacs, and is not geared towards code manipulation like Nano. Wordgrinder reminds me of .. Wordperfect. Remember the little paper strip secretaries had taped to their keyboards in order to remind them what function key did what ? Wordgrinder is more like that. Hitting the escape key brings you into the menu bar where you can select all the functions you expect from a real Wordprocessor… from the early Nineties.
But in a world swamped with widgets, buttons and distractions, in a universe where every application at least has one dingdong to tweet whenever you even THOUGHT about farting in the elevator .. Wordgrinder is safe haven of simplicity and focus. Run it natively on any Linux system or access it via an SSH connection to your Linux system from your Mac or your Pc. Sure it isn’t high tech, but it does the job pretty well. For all those times you need to knuckle down .. Wordgrinder is your friend.
Install it from the command line (On Ubuntu)
sudo apt-get install wordgrinder


