

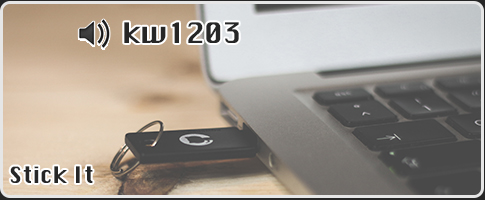


Point the Way Home: DDNS with Linode
Aug 02Guest Blogger: Keith Murray
Earlier this year I switched my web hosting from my long-time account at DreamHost to a fancy new VPS at Linode. I really did enjoy my time with DreamHost, but what I wanted out of my hosting provider had changed somewhat. I was looking for full control of a machine in the cloud. Although DreamHost does offer a VPS option, the pricing options just didn’t compare with what Linode was offering.
I also took the opportunity to move my domain registrations over to Hover, but more on that another time.
With my Linode account managing the DNS for my domains I was able to point a a single subdomain back at the IP of my home network, effectively giving me a nice publicly accessible domain from within my network. This worked well until my ISP changed the IP address I had. Admittedly this doesn’t happen often, but it always seems to occur when I actually need to make use of this remote connection, and with no knowledge of my new public DHCP address it’s pretty useless.
Enter DDNS.
With some modifications to a script I found on GitHub I was able to quckly set up job to check my public IP address and update the DNS records at Linode using the Linode API. I hacked apart the original script and put together my own DDNS update script, suitable for automating.
By scheduling the script to run using a simple crontab entry I can rest assured that every night, while I’m asleep, my server will be connecting to Linode to point the way home.
Keith Murray is a software architect and developer who blogs about technology and science at kdmurray.net. He can also be found on twitter as kdmurray.
Related Posts
The perfect partition setup for a multibooting system.
Jul 19( From our Guestblogger Matt McGraw) When sliding, we want to minimize the duplication of data so it makes sense to share a /home partition across all of our installs. That way, whatever OS we boot into, we have access to our locally stored documents, music and photos. The easiest way to do this is to simply create a separate /home partition and point each install there. If you format this /home as FAT32 even Windows can use it. This works well if you use a linux OS and a Windows OS because the same application stores data differently across the different operating systems. But what if you have multiple Linux OSes installed?

On my machine, I dual boot OpenSuse 12.3 and Xubuntu 13.04 and I keep a spare partition for testing distros or installing Windows 7 (if I have to). My partitions are set up as follows:
/dev/sda1 – Swap
/dev/sda2 – “home” (contains my user/Music, Pictures, Downloads, Documents, Videos directories)
/dev/sda5 – OpenSuse 12.3 / partition
/dev/sda6 – Xubuntu Raring / partition
/dev/sda7 – “testing” partition
Initially, I set up OpenSuse and Xubuntu to mount /dev/sda2 to /home. This seemed like the best way to have access to all my data/media across both OSes. (I use OpenSuse as my “daily driver” and I use Xubuntu for writing and content creation). The problem was, the two OSes used slightly different versions of Chromium and the profile files were corrupting each other. Chromium for linux stores it’s profile data in a hidden directory under the users home directory. As I switched back and forth between the two OSes, the slight differences between the versions of Chromium caused problems. What to do? At first, I thought I would have to relegate myself to using Chromium on one OS and Firefox or Midori on the other. But, as Knightwise would say, sliding means using the same tools across your platforms. Fortunately, I came up with a fairly elegant solution.
I decided to reinstall everything (I had Arch on my “testing” partition and it was kind of a headache). I left my /dev/sda2 partition untouched and reinstalled OpenSuse and Xubuntu. For the OpenSuse install, I specified /dev/sda5 as the root partition and for the Xubuntu install, I specified /dev/sda6 as the root partition. I did not specify a separate partition as /home; instead, I mounted /dev/sda2 as ‘/sharedisk’. I finished the install as normal and booted into OpenSuse. Here’s the “linux magic”. I went into my home folder and deleted my Music, Pictures, Downloads, Documents, Videos directories. Then, I issued the ln command. I created symbolic links to /sharedisk/user/Music, Pictures, Downloads, Documents, and Videos in my home folder. I did the same in Xubuntu and Voila! I had shared data folders across my distros and unique settings directories for each one. I suppose it goes without saying that I used the same username and UID across the distros. This ensures I can access the files in the shared directories.
I hope this idea might help any of you installing multiple distributions on the same machine.
Guestblogger Matt McGraw lives in the beautiful central valley of Northern California. He is a a stay at home dad and “family tech support” provider. He has a passion for technology and fatherhood. His kids are 11, almost 3 and just over 1 years old and he loves taking pictures of them and posting them EVERYWHERE. You can find Matt online atg33kdad.thestrangeland.net, on twitter @sahgeekdad, and on google plus atg33kdad.thestrangeland.net/
If you also want to be a guestblogger on Knightwise.com ? Send us an email or find us on Googleplus and join the community over at www.knightwise.com/googleplus
Related Posts
KW Videoblog for 7-6 : Cyberpunk Librarian tells us about cross platform sliding at work.
Jul 09Together with some great community content from viewer Cyberpunk Librarian who is showing us “How he uses cross platform technology at work” we also have a guesthost for this weeks videoblog.
Shownotes
- Find Cyberpunk Librarian at …
- bibliosophs.com | qcfriends.
org/notallbits - youtube.com/user/
cyberpunklibrarian - Music by Incompetech.com
Related Posts
kw606 : Making your Mac cross platform friendly.
Jul 06 We dive behind the microphone and give all of you Apple users a slice of pie you don’t want to pass up on. We talk about making your Mac “Slider” friendly and how to put up ladders and crawl out of Apple’s walled garden. We have quite a slew of interesting tips and tricks on how to run “cross platform” applications, files, filesystems and connections through your favorite Mac. Learn and listen to this episode of the podcast that is filled to the rim with community feedback and contributions and great music by Youtube princess Juless.
Shownotes.
- Why ?
- How to get started.
- Remapping your brain and your body.
- Desktop enhancements.
- Loginox.
- PathFinder.
- iTerm
- 20 Best command line hacks.
- TextWrangler
- QuickSilver
- Crashplan
- Make executable scripts on OSX.
- Cross platform applications.
- Use Virtualbox in Seamless mode.
- Web tools.
- Online Photoshop Pixlr
- Macports.
- Cronnix.
- Dropbox
- Bittorrent Sync
- Macfuse
Tweak code (Copy and paste in your OSX command line)
#make dock appear instantatiously
defaults write com.apple.Dock autohide-delay -float 0 && killall Dock
#don’t reopen every file when you reopen your app.
#in preview
defaults write com.apple.Preview NSQuitAlwaysKeepsWindows -bool false
#in quicktime
defaults write com.apple.QuickTimePlayerX NSQuitAlwaysKeepsWindows -bool false
#kill the dashboard
defaults write com.apple.dashboard mcx-disabled -boolean YES
killall Dock
#show the path in the finder
defaults write com.apple.finder _FXShowPosixPathInTitle -bool YES
#disable window animations
defaults write NSGlobalDomain NSAutomaticWindowAnimationsEnabled -bool false
#enable direct scrolling
defaults write -g NSScrollAnimationEnabled -bool NO
#no more bouncy windows when scrolling
defaults write -g NSScrollViewRubberbanding -int 0
#set time machine backup to 1800
sudo defaults write/System/Library/LaunchDaemons/com.apple.backupd-auto StartInterval -int 1800
#force expanded save-and-print dialogs
defaults write -g NSNavPanelExpandedStateForSaveMode -boolean true
defaults write -g PMPrintingExpandedStateForPrint -boolean true
#no 3d-glassy dock
defaults write com.apple.dock no-glass -boolean yes
#show hidden files in finder
#defaults write com.apple.finder AppleShowAllFiles TRUE
#killall Finder
#3d glassy dock
defaults write com.apple.dock no-glass -boolean no
#make hidden app icons semi transparent
defaults write com.apple.Dock showhidden -boolean yes
#create a ‘recent items’ stack
defaults write com.apple.dock persistent-others -array-add ‘{ “tile-data” = { “list-type” = 1; }; “tile-type” = “recents-tile”; }’
#screen grabs in jpg
defaults write com.apple.screencapture type jpg
- Music by Juless
- Feedback by Mr Gadgets and Matt McGraw
- Join the community on Google+
Related Posts
KW Videoblog for 28-6 : Community news and a peek at my desk.
Jun 29We are back with another weekly videoblog and fill you in on whats going down in the Knightwise.com sliders community. We drop a couple of big names on who is signing up for our “Avengers assemble” project where we are looking for guestbloggers, content creators and backend mavens. As a bonus we swivel the camera around and take a close look at the production desk and what kind of clutter we use to punch the show together.