


KW Videoblog for 7-6 : Cyberpunk Librarian tells us about cross platform sliding at work.
Jul 09Together with some great community content from viewer Cyberpunk Librarian who is showing us “How he uses cross platform technology at work” we also have a guesthost for this weeks videoblog.
Shownotes
- Find Cyberpunk Librarian at …
- bibliosophs.com | qcfriends.
org/notallbits - youtube.com/user/
cyberpunklibrarian - Music by Incompetech.com
Related Posts
kw606 : Making your Mac cross platform friendly.
Jul 06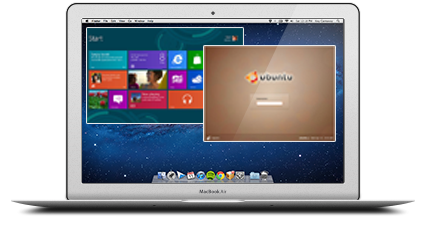 We dive behind the microphone and give all of you Apple users a slice of pie you don’t want to pass up on. We talk about making your Mac “Slider” friendly and how to put up ladders and crawl out of Apple’s walled garden. We have quite a slew of interesting tips and tricks on how to run “cross platform” applications, files, filesystems and connections through your favorite Mac. Learn and listen to this episode of the podcast that is filled to the rim with community feedback and contributions and great music by Youtube princess Juless.
Shownotes.
- Why ?
- How to get started.
- Remapping your brain and your body.
- Desktop enhancements.
- Loginox.
- PathFinder.
- iTerm
- 20 Best command line hacks.
- TextWrangler
- QuickSilver
- Crashplan
- Make executable scripts on OSX.
- Cross platform applications.
- Use Virtualbox in Seamless mode.
- Web tools.
- Online Photoshop Pixlr
- Macports.
- Cronnix.
- Dropbox
- Bittorrent Sync
- Macfuse
Tweak code (Copy and paste in your OSX command line)
#make dock appear instantatiously
defaults write com.apple.Dock autohide-delay -float 0 && killall Dock
#don’t reopen every file when you reopen your app.
#in preview
defaults write com.apple.Preview NSQuitAlwaysKeepsWindows -bool false
#in quicktime
defaults write com.apple.QuickTimePlayerX NSQuitAlwaysKeepsWindows -bool false
#kill the dashboard
defaults write com.apple.dashboard mcx-disabled -boolean YES
killall Dock
#show the path in the finder
defaults write com.apple.finder _FXShowPosixPathInTitle -bool YES
#disable window animations
defaults write NSGlobalDomain NSAutomaticWindowAnimationsEnabled -bool false
#enable direct scrolling
defaults write -g NSScrollAnimationEnabled -bool NO
#no more bouncy windows when scrolling
defaults write -g NSScrollViewRubberbanding -int 0
#set time machine backup to 1800
sudo defaults write/System/Library/LaunchDaemons/com.apple.backupd-auto StartInterval -int 1800
#force expanded save-and-print dialogs
defaults write -g NSNavPanelExpandedStateForSaveMode -boolean true
defaults write -g PMPrintingExpandedStateForPrint -boolean true
#no 3d-glassy dock
defaults write com.apple.dock no-glass -boolean yes
#show hidden files in finder
#defaults write com.apple.finder AppleShowAllFiles TRUE
#killall Finder
#3d glassy dock
defaults write com.apple.dock no-glass -boolean no
#make hidden app icons semi transparent
defaults write com.apple.Dock showhidden -boolean yes
#create a ‘recent items’ stack
defaults write com.apple.dock persistent-others -array-add ‘{ “tile-data” = { “list-type” = 1; }; “tile-type” = “recents-tile”; }’
#screen grabs in jpg
defaults write com.apple.screencapture type jpg
- Music by Juless
- Feedback by Mr Gadgets and Matt McGraw
- Join the community on Google+
Related Posts
Give your IOS device an organised touch with Shelved wallpaper.
May 06The downside to having an Android device is that the home screen is completely tweakable. What starts out as a pristine and low-key desktop, soon turns into a mayhem of icons, shortcuts and widgets. The downside to such unrestricted personal freedom on your device is that you sometimes risk ending up with a home screen that looks a lot like your Uncles Windows 95 machine after 2 years of use.
Ios users have no such troubles. Cupertinian law has stated that there ARE no widgets and that each row of icons must be completely filled before you add another row of icons below. Such totalitarian control makes for a tidy room .. but also a dull one.

So what to do ? You want to give yourself at least some notion of “personification” of your portable device ? You can do so by putting up some shelves… Wallpaper shelves that is. Howtogeek.com has an interesting collection of “wallpaper shelves” for that very purpose. I agree, its not a very exiting hack, since in IOS every screen has the same wallpaper .. but its way better then having the picture of your beloved covered in icons that cover up his/her/its sweet facade.
You can get the wallpapers HERE.
Related Posts
Leaving your gadgets in the car ? Don’t forget to “Cloak” them.
May 05Traveling around with a bunch of tech stuff in the car is always a little tricky. You might need that laptop with you on your roadtrip, but you are surely not going to drag that 17 inch Macbook Pro all the way up the 298 stairs to visit that random monument of William Shatner along the way ? So you need to leave stuff in the car. Here are a couple of tips on how to do that … safely.

- Store them out of sight. : Leaving your Tomtom gps stuck to your windshield as you walk away from your vehicle is just plain dumb. Don’t even leave your gadgets in plain view.
- Don’t store them in the “Obvious” locations : Leaving your Cellphone on your passenger seat or in your glovebox is also something thats a little tricky. If anyone pops into your car to grab your gear, these are the first places they are going to check. The trunk is tricky but a little better because its completely out of sight.
- Park in sight. : Did you see a parking spot in an alley somewhere ? One of those places where nobody walks by and your car is completely out of sight of passers by ? Don’t ! Make sure you park in a place where somebody smashing your windshield might get “noticed” by other people.
- Take your gadgets “undercover”. : A friend of mine had a greasy pizzabox parked on his passenger seat. When I asked him if he just had dinner, he flipped open the lid and revealed his laptop and smartphone nicely stored inside He had even made nice compartments and had used some Velcro to keep everything in place. With the lid down it was a pizza fest in progress, with the lid UP it was a little datacenter. A cool hack !
- Cloak your gadgets. No matter how hard you hide them .. some of your gadgets might still be detectable… How ? They are actually screaming “I’m RIGHT HERE”. Leaving bluetooth enabled (and having your devices detectable via bluetooth) gives any passer by (with evil intention) a pretty good idea if there is any tech stored nearby. If you leave the “default identification” on , your smartphone might actually be telling them what kind of loot they expect. Its hard to determine where exactly stuff is stored .. But if your car is the only one around … they might have a pretty good chance of scoring if they smash your window. So : Airplane mode !
These are just a couple of tips to keep your tech safe in the car. Do you have some more ? Or perhaps you want to share YOUR secret hack with us ? Do so in the Comments Section below.
Related Posts
Find focus by building your digital Zen-Zone.
Apr 30 After our home renovations I found myself forced to move my office to the attic of our house. It was time to tear down the carefully constructed nexus my digital lifestyle up one level. But it was also time to think things over on how I wanted stuff to be set up. Where my old desk was arranged in a C-shape, surrounding me with multiple monitors and computers, all available with a smooth swivel of my chair .. my new office was a “one line setup”, stretching out the entire length of the workspace in a single row. This meant it would be impossible to use the setup with just “one chair”, in essence creating more then one workspace. What now ?
“Comfort zone”.
I decided to do things differently this time. My multi-monitor-multi-media workstation with its 2 massive 24 inch displays, its mixers, its speakers and all the other gadgets would be sprawled onto one “desk” and .. I would leave the other desk completely empty. Instead of packing it with screens and keyboards, a little lamp, a wireless mouse and a collection of power and network cables was al that was visible on the workspace. This “second desk” is the one I want to use when the countless windows and digital clutter are getting out of hand. I just pop down here with whatever laptop I’m using (My Mac, My Linux machine, My work laptop) to get things done. I just sit down, hook up and focus on what I’m doing. Distractions are few because .. its just a cosy little corner .. opposed to a Nasa style multi-display supercluster.
“Zen Zone”
But just a “different spot” is not enough. One might still be bombarded by digital distractions like eMail, Social media and so forth. So I created a different user profile on my laptop (s) that I call the “Zen Zone” A profile that does not have IM or eMail clients configured. Just the bare minimum will suffice. Access to a browser, word processing apps, whatever I need to get stuff done .. but ONLY that. If I really wanted to I could remove the admin rights to this profile, change the proxy settings and make sure that my “Zen Zone” would be unable to access the internet unless I reboot. It might be tricky to do so when you work in the cloud a lot, but when you need to “get down and dirty” with something you need to get done .. this might help you with your self discipline. You need to “log out” and “log back in” to a different user if you want to go online. This will surely help in controlling your impulses to “quickly browse the web”.”
“Zen-ware”
Especially when it comes down to writing or being creative, having as few distractions as possible does help a lot. There are a number of applications that help you do this. Taking away all the bings bongs and chimes from the busy desktop interface and just giving you a plain interface. Ommwriter ( Windows, Mac, Ios) or Focuswriter (Linux and Windows) are great ways to find a tranquil slate of screen to do your thing. Finding an online pomodoro timer might also help you keep your Cyber-ADD in check by giving you a focus-countdown timer with rewards when you completed a task.
In the end it comes down to a little self discipline and letting technology work for you instead of getting in your way .. to get stuff done. So : What are YOUR tips and tricks to stay focused and not goof off all the time ? Tell us in the comments section.