


Server Week: What is OSX Server and Why Would a Home User Need One ?
Apr 02*By guestblogger Todd Oldhoff *
As someone who teaches about using OS X Server I get a lot of questions from home users about why they would even need a server in the first place. Most people perceive that servers are for big business operations. They are huge machines that sit in a dedicated room and are monitored by IT professionals who make sure everything is running smoothly and fix things when they break down. The whole process seems overwhelming and most feel they lack the expertise and spare room to even consider running a server. So why would a home user need to run it in the first place?
I want to start by saying this is a great question to ask and one that we should ask not only as it relates to servers but all of the software we use. If you don’t have a real need for an application you should just avoid it as it will only clutter up your hard drive and cost you money to purchase. Also, if at the end of this post you still don’t see the need for running a server than don’t do it. This article is designed to help you see what a server could do for you so you can truly determine whether the features fit any of your needs. So let’s get started with why you might want to run a server by looking at the hardware requirements.
One of the myths most people have about servers is they are huge machines that need dedicated rooms to run. The beauty of our current place in history is that servers can be run on very small hardware that won’t take up more than the size of a shoe box on your shelf depending on your needs. You can run OS X Server on a Mac Mini and have plenty of power for your home environment. In fact I would recommend using a Mini for home use because of the power benefits and it’s small size. I would however recommend getting at least 8GB of RAM and, if you can swing it, 16GB. With that you should be in great shape to run OS X Server. But server can also run on any Mac you have in the house so don’t feel like you have to purchase a new Mac to run server (unless of course your Mac is too old to run Mavericks). As long as you plan on leaving your server on and not move it around, you could even use a laptop.
Now that we have the hardware issue out of the way, let’s look at some of the benefits of running a server in a home environment. Each of these things should give you a good idea if Server is for you:
Wireless Time Machine Back Ups
If you don’t happen to have a Time Capsule or would rather have your storage space outside your router, you are out of luck when it comes to wireless Time Machine backups. Yes you could do some things to try to get it to work with an Airport Extreme Base Station with an attached drive but things could get corrupted and its not supported by Apple. With OS X Server you can designate any drive connected to your Mac Server to serve as a back up disk for Time Machine and the best part is that it is supported by Apple.
Your Own VPN Service
With most of us spending a lot of time on unsecured public networks, fear of data being stolen over the air is a real concern. VPN creates an encrypted connection to the internet and protects what is sent and received over the air. OS X Server has a built in VPN service that you can use on all of your devices to make your remote web access secure.
Network Accounts
With most of us having multiple computers at home with multiple users wanting to access their stuff on those computers having the ability for any user to log into any computer on your network to access their files and desktop is a much needed service. With OS X Server you can create your own network accounts and host your user’s home folders on the server so they can access their own desktop and files on any Mac in the house. This really saves arguments over who gets what computer in the house. If you have kids you know what I mean!
File Server
One of the first things most people think about when it comes to a server is gaining access to files when they are away from their main Mac and outside their network. With a server, you can designate any folders or drives as accessible outside your network and set who can access what files and folders.
Manage Multiple Devices
Most homes have become mini corporate environments with multiple Macs and iOS devices. Managing all of those devices can be tedious and difficult to set up and maintain. With OS X Server you can manage all of your Macs and iOS Devices from a simple web interface and push changes over the air to your devices as groups or individual device profiles making managing devices a lot easier.
Personal iCloud Service
For some people the idea of having all of their personal information online in the cloud somewhere makes them uneasy. What happens if a security breach happens with the service you are using? Instead of having those things on a hosted service, they may want to manage their own calendar, contact, iMessage and Mail Server. For those with kids this is a great way to help them get their feet wet in some of these services while you control what they can can’t see or do. Built into OS X Server are services to that allow you to manage these things and then sync your settings to all of your Apple devices.
Personal Web Server
Built into OS X Server is a web server complete with a built in Wiki website that you can customize. You can also host your own websites with OS X Server though there are some challenges for home users depending on your ISP service and how they feel about home users hosting websites. But even with that limitation you could host an in-house only website that your family uses on your home network only to share things. Another great way to get the kids used to using a website and publishing to it in a safe environment.
As you can see there are a lot of different uses for OS X Server for home users. If you saw anything in there that you could take advantage of, then OS X Server is for you. You don’t have to use every service to run server but can pick and choose what works best for you. For those of you that like step by step instructions on how to set all of this up, I have a Youtube Channel where I do just that. You can check out more information on my website or on my Youtube Channel. If you choose to get started and get stuck along the way feel free to send me an email or leave a comment.
About Todd.
Todd Olthoff is a Mac enthusiast who loves to pass on what he has learned to others. He regularly produces screencast tutorials on his website and on his Youtube Channel. He is also a regular contributing screencaster for ScreenCastsOnline and for MacStadium a Mac colocation company.
Links.
Related Posts
Server week : The essential SSH Server.
Mar 18This week in “Server week” we are going to set up a variety of servers that allow you to do a variety of things. One of the most basic and versatile server you can set up must be the SSH Server. Long time fans probably know that the SSH server is the base ingredient for a lot of fun stuff you can do. For example.
- Transfer files over the internet.
- Work with command line applications from a remote computer.
- Tunnel your browser traffic through your own server to stop nosy network admins.
- Connect to your home network with a VPN connection.
These are just a couple of things you can do, but before you can do that, you will need the basic ingredient : Let’s set up an SSH Server.

Required ingredients.
- Debian based Linux distribution : ( you can do it with a redhat based one too, but we use a debian based one for the tutorial)
- Static ip for your Linux distribution.
- Connection to the internet.
- If you don’t have a static IP : A dynamic DNS service like opendns or Dyndns.
- An open port on your router forwarded to your linux machine.
Let’s get cooking.
- Open up a terminal on your linux machine and type : sudo apt-get install openssh-server
- After the server is installed, connect to it from a remote machine using a terminal application like Putty (for Windows) Secure Shell (for the Chromebooks) or from the terminal on other Mac and Linux machines.
- Connect to your Linux server with the command : ssh yourusername@theipofyourserver
And starting out that is ALL you need to do. If you want to do this from the internet you need to forward the correct port (The standard port is Port 22) from your router to your linux machine so you can make it accessible from the internet.
Lets make it pretty.
- Want to have a unique login screen when you connect ? create a cool ASCII banner using THIS tutorial.
Lets make it secure.
- SSH servers run standard on port 22, so a lot of scriptkiddies will go around the internet and “knock” on your port 22 to see if there is a server there. We are going to “obscure” the location of your SSH server a little by changing the default portnumber (Remember you also need to adjust this on your server) Follow THIS tutorial to get you started.
- Next time you connect remember to connect with ssh -p portnumberyouchose yourusername@theipofyourserver
- If you want to get rid of entering your password when you connect you can log in using secure SSH keys. Its a little bit on the advanced geeky side but it DOES keep your machine extremely secure : Only a machine with a unique digital fingerprint can connect using this method : Here is a good tutorial.
Lets start using it.
The SSH server offers you a variety of functionalities we talked about in previous blogposts. We will line up the best uses for SSH here.
- Make a VPN connection to your home network using SSHUTTLE.
- Turn your server into a proxy server and tunnel all browser traffic though your home server. (here is the pdf howto)
- Keep an eye on what your server is doing.
- Run a remote supergeeky wordprocessor.
- Run remote graphical applications.
- Have a blast controlling your server from the command line.
- Run command line apps.
These are just a couple of examples of what you can do over this very powerful little SSH connection. Remember always to use strong passwords and keep your server up to date. Have fun !
Related Posts
Server week : Why not “roll your own private little cloud”.
Mar 10Cloud services. We love them ! All you need to do is hand over your email address, use the same password you have everywhere and sito presto : Before you know it you are using yet another free service that does whatever you require. From handling your email, to storing your documents, from chatting with your friends to keeping track of all the Care-Bear stuff you track on line .. there is a cloud service for everything.

We are not always the customer, sometimes we are the product.
What most of us forget is that, unless you are paying for said service, you are not a customer, but a product. If your free cloud service has any plans about staying in business and paying that giant hosting bill for that ‘free storage’, it’ll better have a business plan. Most cloud services make money by selling you adds that you click on. The people who PLACE the adds are the actual customers of the service .. YOU .. are the product. This might not be true with a paid service ( Another way of working for a cloud service might be to get you hooked with a free account and then make you UPGRADE into a subscription plan). So if you are using that favourite cloud service of yours, ask yourself : Am I ok with being “The Product” ?
Just “Who IS” the cloud ?
Behind every fancy logo or snazzy name is a company. That company can be a multi brazillian dollar company who buys up instant messaging clients for sixteen billion the way you buy new socks. It might also be two crummy guys sitting in their moms basement remote controlling their servers somewhere else. You only see the flashy logo, you never read the terms of service (just click agree-agree-agree) and have no idea of who might be looking at your data. Who knows you may have signed over the creative rights of your summer snapshots to the cloud company that turns it into a “Free online picture-slideshow”.. because you never read the terms of service. And for the sake of argument : What if there is a problem you can’t fix ? Who are you gonna call … Chances are you will probably get to talk to the REAL Ghostbusters before you get a living person on the other end of the line at your “free cloud service”. So are you safe ? Is the data yours ? What happens if the bubble bursts and the service goes away ?
So what if you rolled your own ?
If you make it really simple you can say that cloud services are just servers running on applications. ( But they are actually spread out on servers all over the world and are optimised for coping with a LOT of simultaneous users). But what if you don’t need that ? What if its just you and your dog using them ? Then you could basically run them yourself right ? The answer is : YES. It takes some tinkering and having at least one machine that is online for most of the time to make sure your “private cloud” is accessible but aside from a little patience, a spare machine and an internet connection, its about ALL you need.
I don’t trust cloudy skies.
This week we boldly choose to chose “DISAGREE” on the terms of service of the cloud providers, we decide NOT to trust their free business model and we venture out on our own little geeky adventure : Rolling our own private cloud. The luxury of a cloud service, but being run on your own hardware, in your own home (or on YOUR webspace) with YOU in control. We will try to show you some great examples of just how much fun you can have while being your personal cloud provider. Most if not all services we will setup can be hosted on a Linux virtual machine and are accessible from any operating system (or device) that is capable of connecting to the internet.
Enjoy.
Related Posts
Privacy Week : Tunnel traffic through your home network with Sshuttle.
Feb 06Today’s tip in our “Privacy week” is geared a little bit towards the more advanced geek .. (Who am I kidding, you are ALL advanced Geeks here). In our every lasting quest to ensure our privacy when surfing on “foreign networks” like the one at work, the one at your dorm or the free wifi hotspot at Starbucks , we try to find more ways to make sure all your web traffic is encrypted and your privacy is kept safe.
Enter SSHuttle ( NOOO , not the STAR TREK Shuttle) , A brilliant little transparent proxy application that directs ALL or PART of the network traffic from your trusty Linux or Mac machine (the laptop you use on the road) through an SSH tunnel to an SSH server of your choice (perhaps your own server at home). That way your traffic is completely (or partially) obscured from whoever is trying to sniff your traffic on an untrusted network. An added bonus is however that it is a transparent proxy ! This means your computer will actually think it is directly connected to the network where the SSH server is running. It is like running a very very very long cable through the internet straight from your machine to the network where your SSH server is located.
So let’s start cooking.
Ingredients.
- Laptop with a version of Debian Linux installed or a Mac running a recent version of OSX.
- An SSH server. ( Follow along our VERY OLD but still accurate manual on how to setup your own Linux SSH Server)
- A static IP address for your internet connection. (Or if you have a dynamic IP you can follow along with THIS great tutorial on how to use No-IP.org)
- Forwarding the correct port on your router. (Open up the port you are using for your SSH server from your router to the IP of the machine on which you are running the SSH Server)
How to install SSHuttle on your client machine.
- Install SSHuttle on your Linux machine using the command : sudo apt-get install sshuttle
- Install SSHuttle on your Mac by first installing HOMEBREW APP. (Installation instructions) and then typing brew install sshuttle
Shuttle is simple but VERY powerful. It will create an encrypted tunnel between your laptop and the SSH server you setup at home. Depending on what kind of traffic you want to shove through that tunnel you can do different things like :
- Just tunnel your browser traffic through the tunnel,
- Shove all of your web traffic through the tunnel (including dns requests),
- Shove ALL of your traffic through the tunnel.
- Set up a “site 2 site” VPN between the network you are working on and your network at home.
- … and more crazy stuff.
So how does it work ?
Once installed using SSHuttle is pretty simple. SSHuttle works from the command line and depending on the “switches” it will do different things for you. So on your client laptop , fire up your terminal and start typing.
-
sshuttle --dns -r username@yourremoteserver.com:2222 0/0
Enter the command above to push ALL of your traffic through the SSH tunnel towards your server at home. This is the example of running a virtual network cable THROUGH the internet towards your switch at home. All of your traffic is sent through this encrypted tunnel. USERNAME = A user you have created on your SSH server at home. YOURREMOTESERVER.COM = The external ip address (or Dynamic DNS name) of your home router. 2222 = The port on which you have your SSH server running. In this example I took a non-default port.
- sshuttle -r username@yourremoteserver.com:2222 192.168.0.0/24
With this command you can create a site to site VPN. Instead of typing 0/0 is going to send ALL the traffic through the tunnel. Typing the network range of your home network (in this case 192.168.0.0) tells SShuttle to send all the traffic that needs to go to the 192.168.0.0 domain through the tunnel, while sending out the rest of your traffic through whatever network gateway you are connected to. The /24 is your subnet mask ( you know , the 255.255.255.0 subnet number of your network).
There are a lot of other switches that you can use , but if you use the two commands we mentioned above you will have a LOT of power at your fingertips. I love using the second command. It allows me to connect to the exchange server at work for my work stuff, but also lets me quickly open up the web interface of my home router (on the LAN SIDE) to do some tinkering. SSHuttle is a very very nice tool that keeps you connected .. and keeps your privacy .. private.
Find out more about SSHUTTLE in this HAK5 episode.
Related Posts
Sync all your iTunes playlists to your Android phone with Tunesync
Jul 30The thing with proprietary software solutions, is that they are great. Everything tends to work smoothly together right up to the point where you decide to wander off the beaten path of supplier XYZ. A couple of years ago I made the crucial mistake of pouring my entire music collection into iTunes. Now, some 10 000 songs later .. its still in there. Being totally OCD I have organized all my tracks into nice little playlists and enjoy my tunes in the “Apple walled garden”. Whether I am playing them from the Mac, sharing out the iTunes library over iTunes to my other macs, blasting them from the Airport express speakers or syncing them to my other i-Devices.
But a couple of weeks ago I could not help myself myself and crawled over the walled garden into android territory with my purchase of a Galaxy Note 2. And accessing my delicately curated iTunes library from THIS device turns out to be an near impossible task. The deep crevasse that divides me from listening to my tunes on my “droid” consists of an incompatibility to sync with iTunes (only IOS devices of course) and the total inability to get the music on my Android in an organised form. Sure I can browse the filestructure of my iTunes library and copy over files to the SD card on my Phone .. but iTunes has “reorganized” my music into folders according to artist .. not according to playlist.
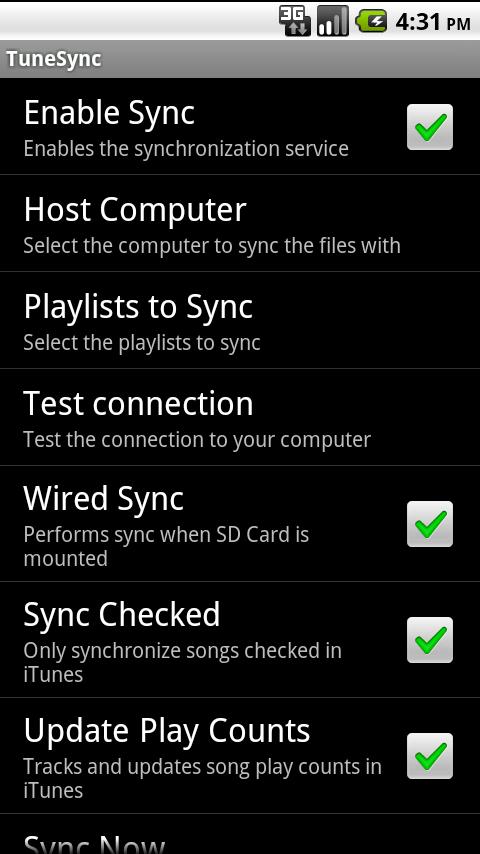
Enter Tunesync. A two-part application app in the android store that saves the day. The deal is simple. Download the server part of their app and install it on your Mac that is running iTunes. Download the CLIENT side of their application and install that to your Android device. Make sure both are on the same wifi network and be amazed !
Tunesync detected my (massive) iTunes library and started indexing the playlists right away. After I selected the playlists I wanted to have on my Android it started to copy over the tracks AND the playlist order in my Androids music collection. 20 minutes later I had all the grooves I needed on my Note2. Tunesync regularly “checks” if the playlists are still up to date and “updates” them whenever I connect or start up the app. I had expected some glitches and on one occasion Tunesync had given me all my playlists .. with no tracks inside ( it erases and re-copies all the tracks on every sync instead of doing an incremental) but when I retried the sync it worked flawlessly.
Tunesync does one thing and it does it well, and the hilarious part is , it does it better then Apples iTunes-IOS wireless sync ! The app is 4.99 in the Play store and worth every dime.
Tunesync is available from the Play Store.